5
Create Groups
5.1
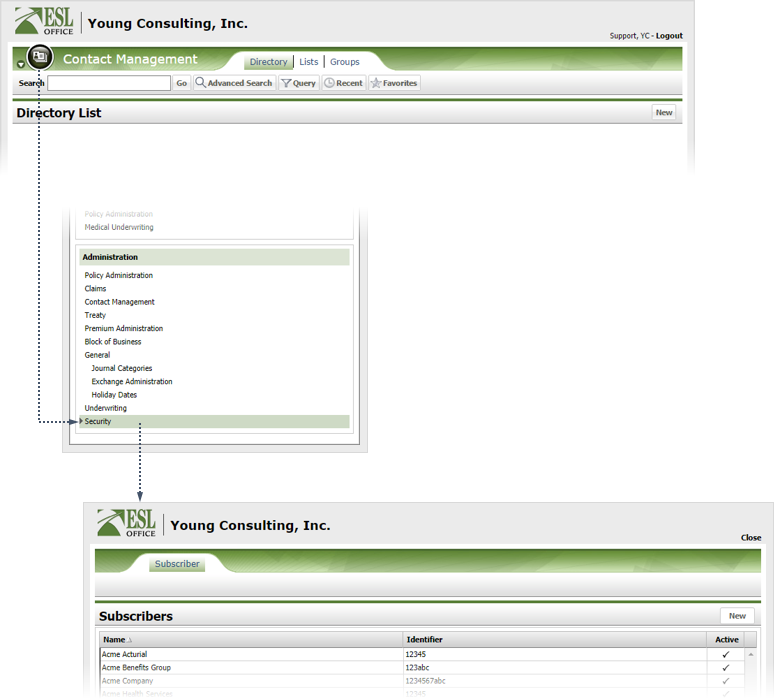
Click the Menu button and choose Security from the Administration list to display the Subscribers list.
Note: Where the Security module appears in the Administration list depends on how your ESL Office installation is configured. If you cannot see the module, contact your ESL Office administrator to make sure you have permission to access the module.
5.2
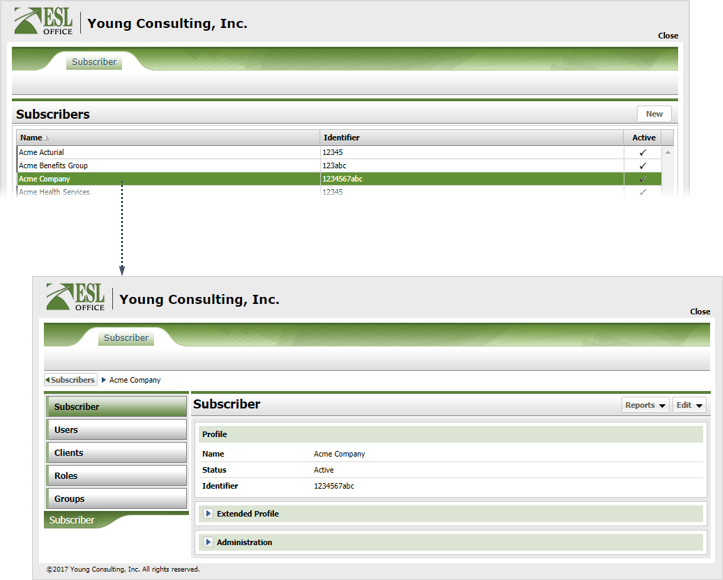
Click the desired subscriber to display its profile.
5.3
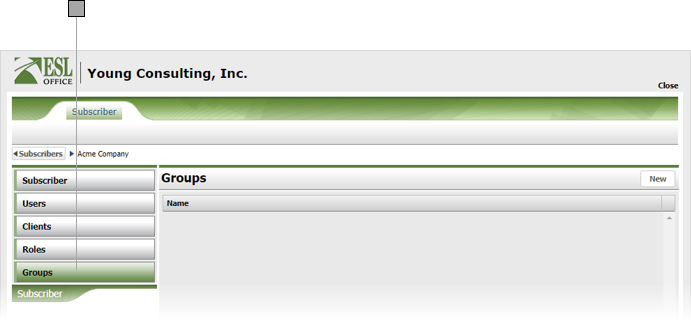
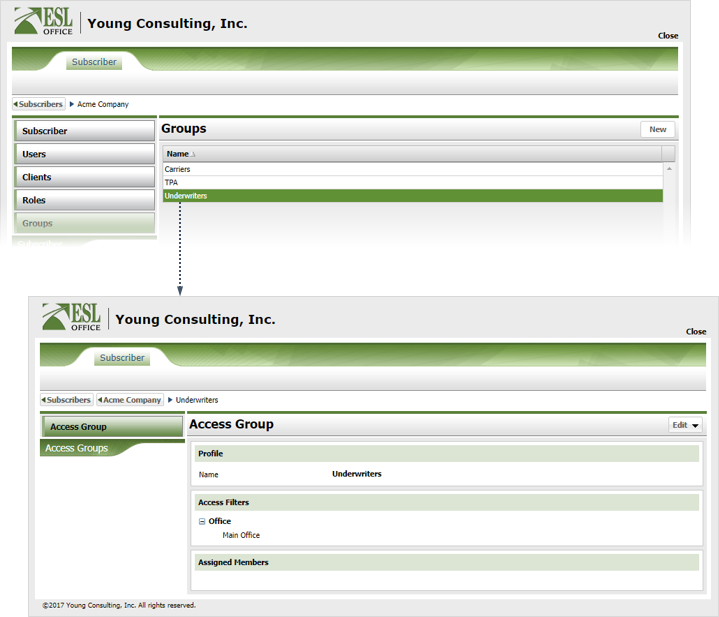
Click Groups.
5.4
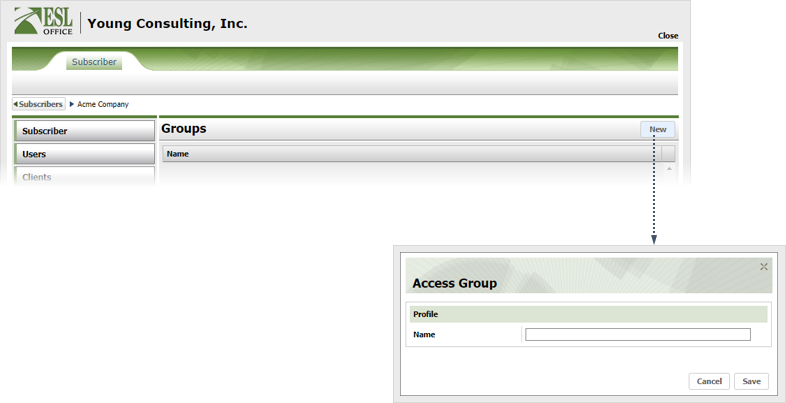
Click New to display the Access Group window.
5.5
Name the group and click Save.
5.6
Click the group you created to display its profile.
5.7
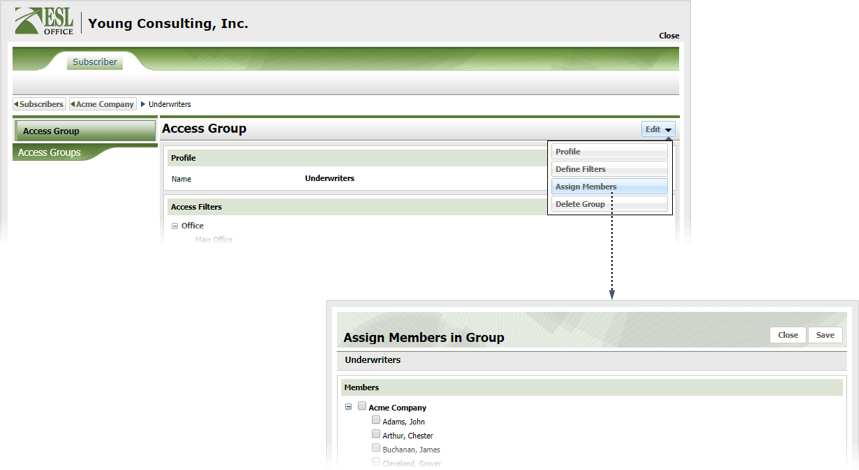
Click Edit and choose Assign Members to display the Assign Members in Group window.
5.8
Check the box by each user you want in the group. Check the box by the subscriber to add all users.
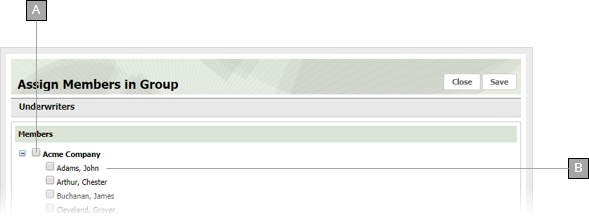
A
Adds all users for the subscriber to the group.
B
Adds the specific user to the group.
5.9
Click Save.