3

Edit Participant

3.1

View the desired case.

3.2

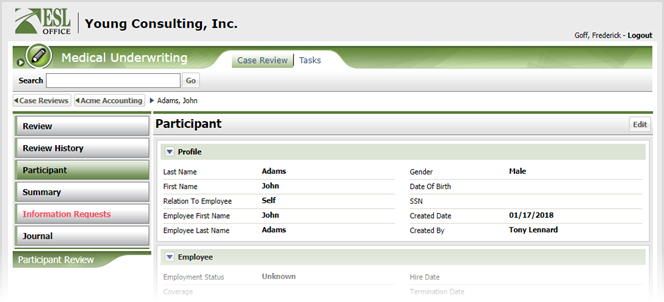
Click the desired participant to display the Participant Review window.

3.3

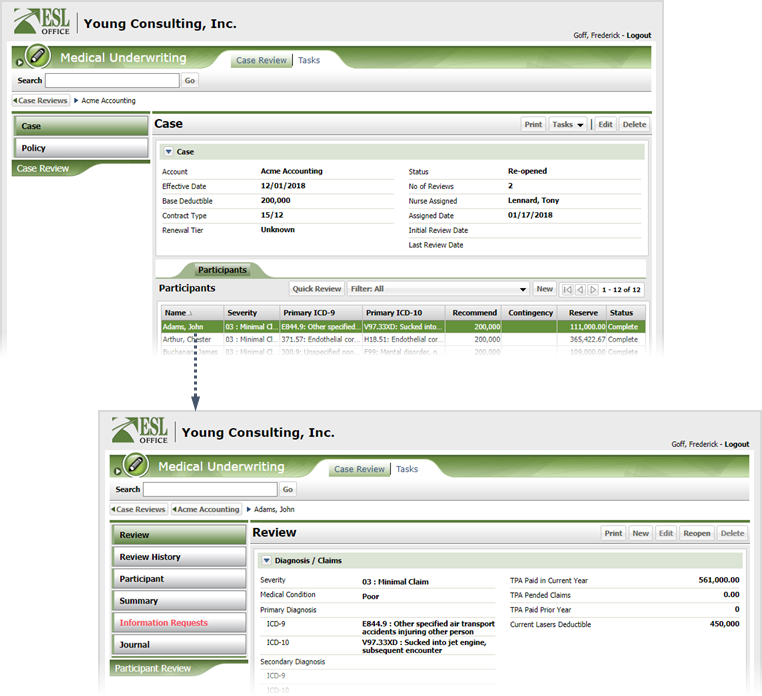
Click the Participant category button to display the participant's summary information.

3.4

Click Edit to display the Account Participant window.

3.5

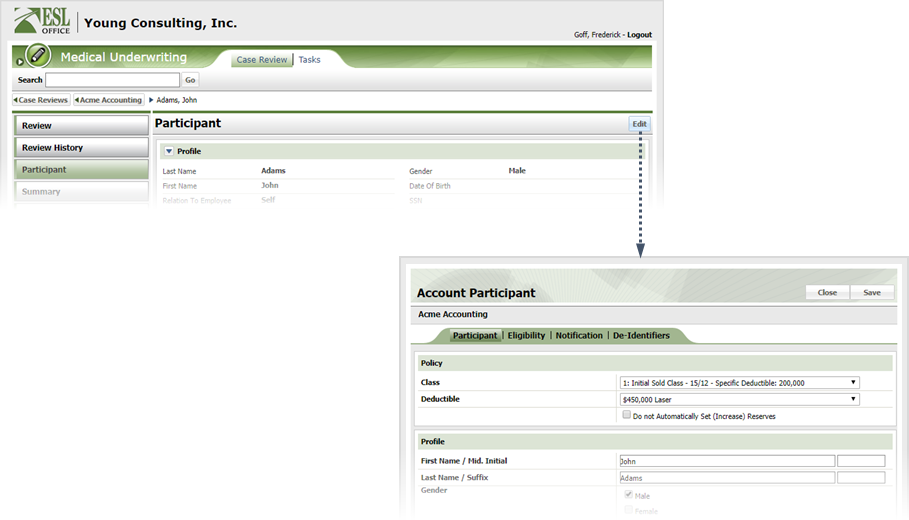
If necessary, click the Participant tab.

3.6

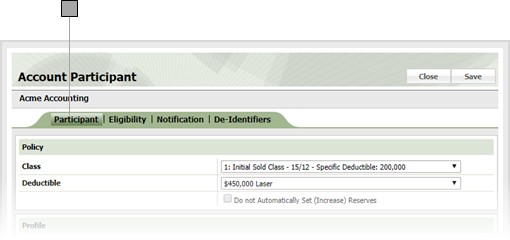
Edit participant information as follows.

Class
Specify the policy class from the drop-down.
Deductible
Specify the deductible from the drop-down. Check Do not Automatically Set (Increase) Reserves to prevent automatic setting of reserves.
First Name / Mid. Initial
Enter the claimant's first name and middle initial in these fields.
Last Name / Suffix
Enter the claimant's last name and suffix (if any) in these fields.
Gender
Check the box corresponding to the claimant's gender.
Birth Date
Specify the claimant's date of birth. Enter the date directly in the field in MM/DD/YYYY format or click the calendar icon and set the date using the date picker tool.
Social Security No
Enter the claimant's social security number here.
Member Number
Enter the member number for the claimant here.
Relation to Employee

Check the box corresponding to the claimant's relationship to the employee. If you check Self, additional fields appear in the window.

Employee

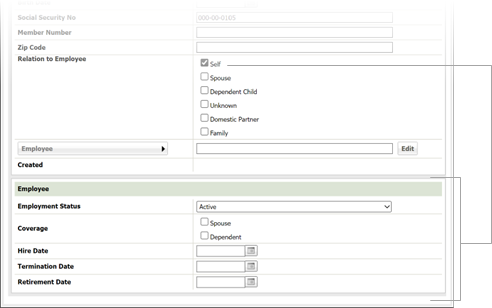
If you check a box other than Self above, click the button and search for and select the employee from Account Participant Search window.

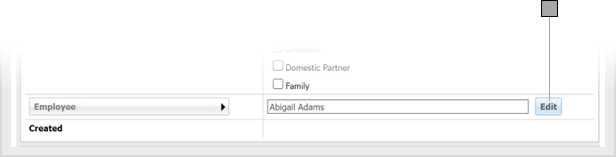
Note: You can edit the employee claimant information by clicking the edit button to the right of the employee name.

Created
Who created the claimant and when. Populated by ESL Office.
Employment Status
Choose the employees current employment status from the drop-down. Appears when Self is checked for Relation to Employee.
Coverage
Specify whether coverage is for a spouse or dependent by checking the corresponding box. Appears when Self is checked for Relation to Employee.
Hire Date
When the employee was hired. Enter the date directly in the field in MM/DD/YYYY format or click the calendar icon and set the date using the date picker tool. Appears when Self is checked for Relation to Employee.
Termination Date
When the employee was terminated. Enter the date directly in the field in MM/DD/YYYY format or click the calendar icon and set the date using the date picker tool. Appears when Self is checked for Relation to Employee.
Retirement Date
When the employee retired. Enter the date directly in the field in MM/DD/YYYY format or click the calendar icon and set the date using the date picker tool. Appears when Self is checked for Relation to Employee.
3.7

Click the Eligibility tab.

3.8

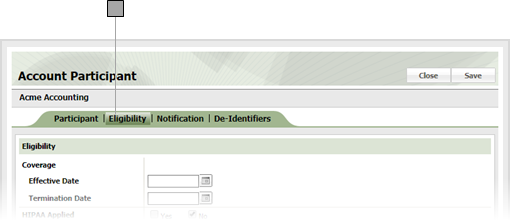
Edit eligibility information as follows.

Effective Date
When the claimant's policy became effective. Enter the date directly in the field in MM/DD/YYYY format or click the calendar icon and set the date using the date picker tool.
Termination Date
When the claimant's policy was terminated. Enter the date directly in the field in MM/DD/YYYY format or click the calendar icon and set the date using the date picker tool.
HIPAA Applied
Check Yes if HIPAA has been applied, and enter the effective date range in the Prior Effective Dates fields. Enter dates directly in the fields in MM/DD/YYYY format or click the calendar icon and set the date using the date picker tool.
COBRA Participant
Check Yes if the claimant participated in COBRA. Enter COBRA effective dates in the two Effective Dates fields, and the date COBRA has been paid through in the Paid Thru field. Enter dates directly in the fields in MM/DD/YYYY format or click the calendar icon and set the dates using the date picker tool.
COBRA not Elected
Check Yes if the claimant did not elect for COBRA and enter the effective date in the Effective Dates field. Enter dates directly in the field in MM/DD/YYYY format or click the calendar icon and set the date using the date picker tool.
FMLA (Family Medical Leave Act)
Check Yes if the claimant participated in FMLA. Enter when leave started and ended in the Dates of Leave fields, and paid through date in the Paid Thru field. Enter dates directly in the fields in MM/DD/YYYY format or click the calendar icon and set the date using the date picker tool.
Leave of Absence
Check Yes if the claimant had a leave of absence. Enter when the leave started and ended in the two Dates of Leave fields. Enter dates directly in the fields in MM/DD/YYYY format or click the calendar icon and set the dates using the date picker tool.
Disabled
Check Yes if the claimant had disability. Enter the disability time frame in the Dates of Disability fields. Enter dates directly in the fields in MM/DD/YYYY format or click the calendar icon and set the dates using the date picker tool.
Medicare
Check Yes if the claimant is or was on Medicare. Enter the date Medicare coverage was in effect in the Effective Date field. Enter the date directly in the field in MM/DD/YYYY format or click the calendar icon and set the date using the date picker tool.
Medicate Part A
Check Yes if the claimant is or was eligible for Part A Medicare and enter when coverage lasted in the Effective Dates fields. Enter dates directly in the fields in MM/DD/YYYY format or click the calendar icon for each field and set the date using the date picker tool.
Medicare Part B
Check Yes if the claimant is or was eligible for Part B Medicare and enter when coverage lasted in the Effective Dates fields. Enter dates directly in the fields in MM/DD/YYYY format or click the calendar icon for each field and set the date using the date picker tool.
Deceased
Check Yes if the claimant has died, and enter the date of death in the Date of Death field. Enter the date directly in the field in MM/DD/YYYY format or click the calendar icon and set the date using the date picker tool.
3.9

Click the Notification tab.

3.10

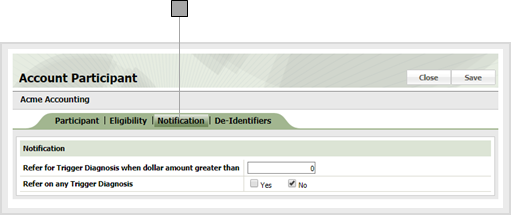
Edit Notification information as follows.

Refer for Trigger Diagnosis when dollar amount greater than
A referral occurs when dollar amount is greater than what you enter in this field.
Refer on any Trigger Diagnosis
Check Yes to generate a referral whenever a trigger diagnosis occurs.
3.11

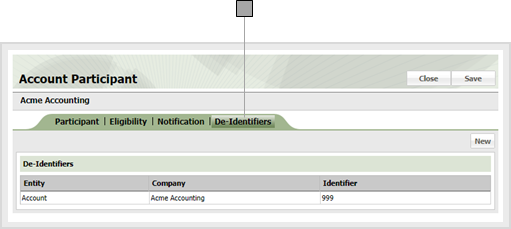
Click the De-Identifiers tab.

3.12

Click New to create a new participant identifier. Click an existing identifier to edit it.

3.13

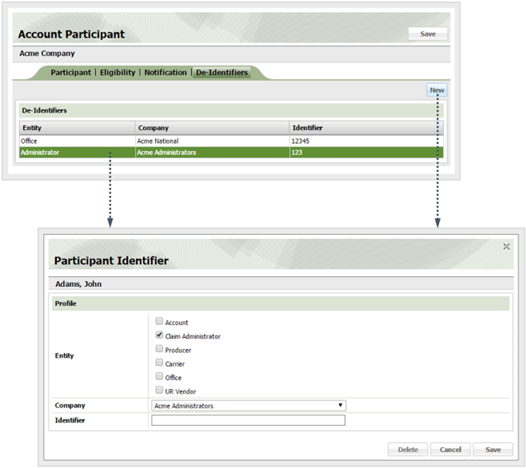
Edit or create the participant identifier as follows, then click Save:

Entity
Check the box corresponding to the participant entity type.
Company
Choose the participant company from this drop-down.
Identifier
Enter the identifier you want to use for this participant here.
3.14

Click Save again to commit your changes and close the Account Participant table.