1
Print Checks – Template
Do the following when you want to print checks using a pre-defined template.
1.1
Search for the desired payees.
1.2
Click Checks and choose Print to display the Print Checks window.
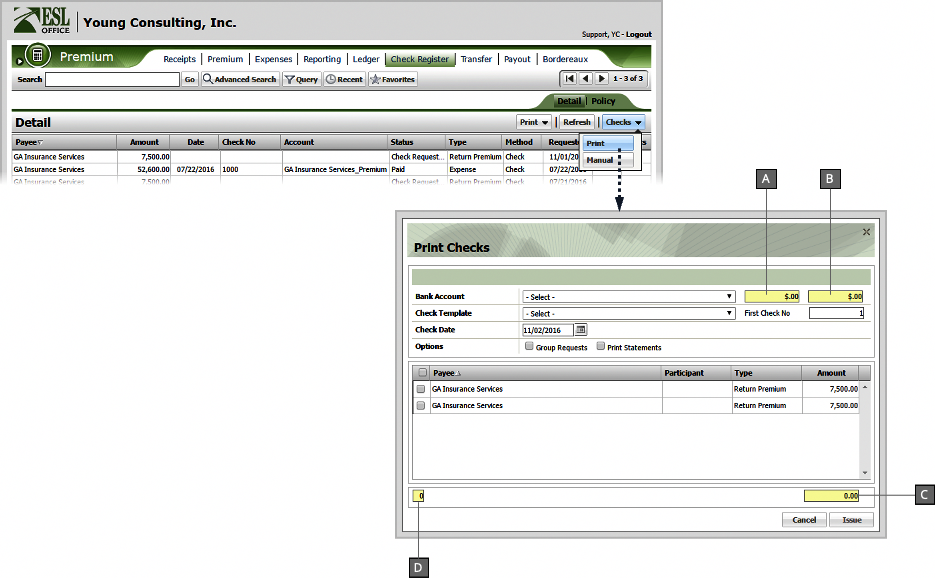
A
Beginning balance for the selected bank account. Populated by ESL Office.
B
What the selected bank account balance will be after the selected payees are paid. Populated and updated by ESL office as you select payees from the Payee list.
C
Automatically populates with the total of all selected payee amounts from the Payee list.
D
Automatically populates with the total number of selected payees and equals the number of check you will print.
1.3
Specify check information as follows.
Bank Account
Choose the bank account you will be printing the checks against.
Check Template
Choose the template matching the checks you will print.
Check Date
Specify the date that should print on your checks. Enter the date directly in the field in MM/DD/YYYY format or click the calendar icon and set the date using the date picker tool.
First Check No
Specify the check number for the first check in the printing. Subsequent checks in the printing increment from this value. Initially populates based on the check template you select, but can be edited.
Options
Check the box next to each option you want to include with your printing.
Group Requests
Combing check requests for payees into a single check. Check amount equals the total of all grouped payee amounts.
Print Statements
Print statement information along with the check.
Payee
List of payees requesting checks. Check the box by each payee to print the corresponding check.
1.4
Click Issue to generate the checks.