1

Create a New Policy Invoice

1.1

Click the Account button and locate the desired account using the Search window.

1.2

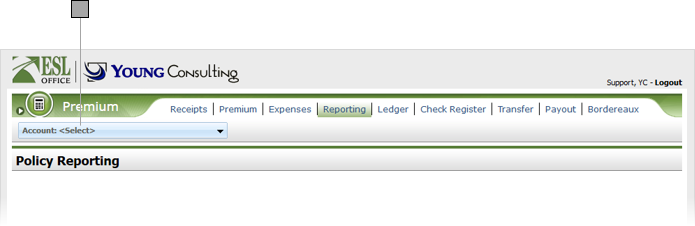
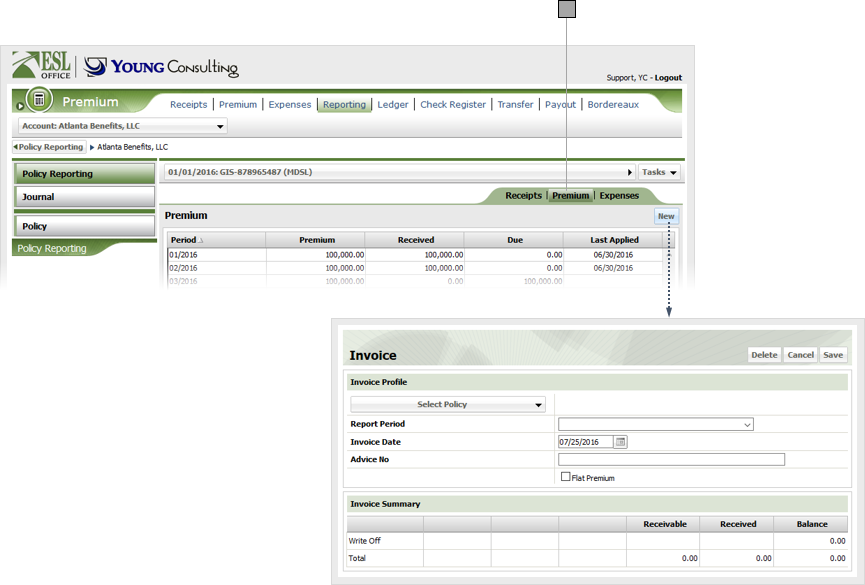
Make sure the Premium sub-tab is selected, then click New to show the Invoice window.

1.3

Click Select Policy and search for the desired policy using the Select Policy window

1.4

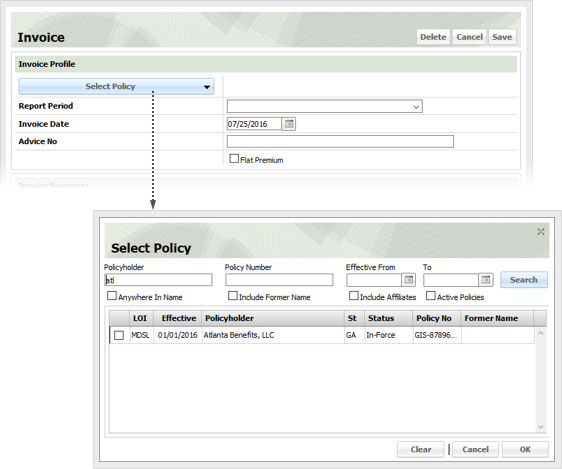
Specify the desired search criteria as follows, then click Search. All search information is additive, meaning ESL Office only returns records matching all your search criteria.

Policyholder
Enter some or all of the policyholder name.
Policy Number
Enter some or all of a policy number to return matching records.
Effective From...To
Specify effective policy dates in these fields to return records with matching dates. Enter the date directly into the field in MM/DD/YYYY format or click the calendar icon and specify the date using the date picker tool.
Anywhere In Name
Check this box to match policies no matter where text in the Policyholder field appears in the policyholder name. Leave this box clear to match policies only when text in the Policyholder field appears at the beginning of the policyholder name.
Include Former Name
Check this box to include policies with former names matching what you entered in the Policyholder field.
Include Affiliates
Check this box to include affiliates in your search results.
Active Policies
Check this box to limit your search results to active policies only.
1.5

Check the box next to the desired policy then click OK to place the policy in the Invoice window and close the Select Policy window.

1.6

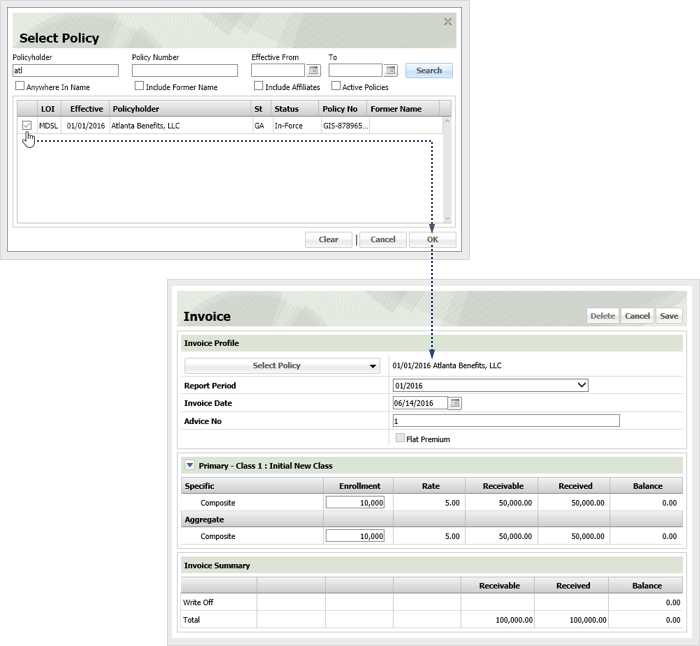
Specify the remaining  invoice information as follows.

Report Period
The report period the invoice covers. Select the desired value from the drop-down.
Invoice Date
Date you are invoicing. Defaults to the current date. Enter a new date directly into the field in DD/MM/YYYY format or click the calendar icon and specify the date using the date picker tool.
Advice No
A unique number identifying the invoice.
Flat Premium
Check if the premium for the policy is flat rate.
Specific Enrollment
Enter the enrollments for the policy during the invoicing period in these fields.
Aggregate Enrollment
Enter the aggregate enrollments for the policy during the invoicing period in this field.
1.7

Click Save to create the invoice. Click Delete to delete the invoice. Click Cancel to close the Invoice window without creating the invoice.