4
Request Checks
Request checks when you are ready to authorize payment on an expense.
4.1
Click the Account button and locate the desired account using the Search window.
4.2
Make sure the Expenses sub-tab is selected, then click Request Checks to display the Expense Payment Request window. The window displays all expenses for the selected policy. You can filter the list by payee, carrier, and treaty.
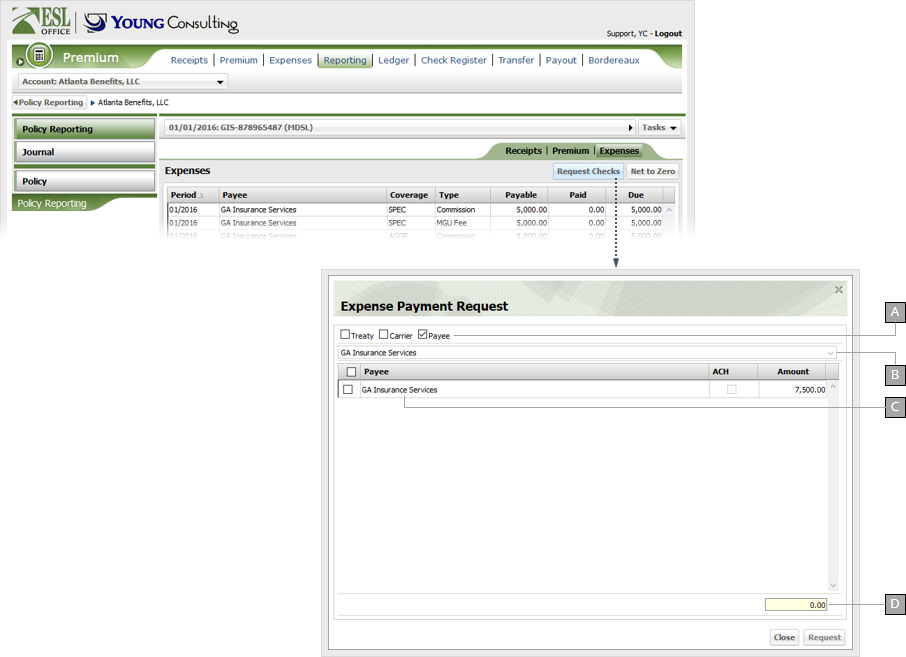
A
Check to filter expenses by the corresponding category.
Payee
Shows all expenses for the policy.
Carrier
Only shows payees for the selected carrier. Use the drop-down to specify the desired carrier. The drop-down only shows carriers for the policy.
Treaty
Only shows payees for the selected treaty. Use the drop-down to specify the desired treaty. The drop-down only shows treaties for the policy.
B
Use this drop-down to select carrier and treaty when filtering payees by those categories. Disabled when you are filtering by payee.
C
List of all expenses for the policy as filtered by your selected category (Treaty, Carrier or Payee). Check an expense to select it for payment.
D
Running total of all checked expenses. Calculated by ESL Office.
4.3
Check the box next to each expense you want to pay. If you are paying the expense via wired transfer, check the corresponding ACH box.
4.4
Click Request to submit the expenses for payment. ESL Office moves the expenses to the Check Register tab.