16
View / Edit Follow Ups
16.1
View the desired specialty case details.
16.2
Click the Follow-up category button.
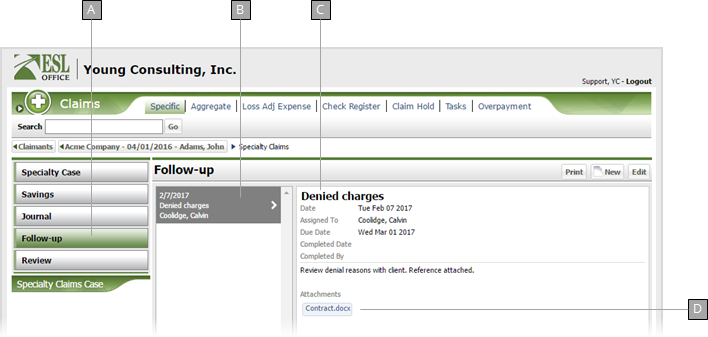
A
Displays follow ups.
B
Follow ups display here. Click a follow up to select it.
C
Contents of the selected follow up.
D
Files attached to the follow up. Click the file to download it to your computer.
16.3
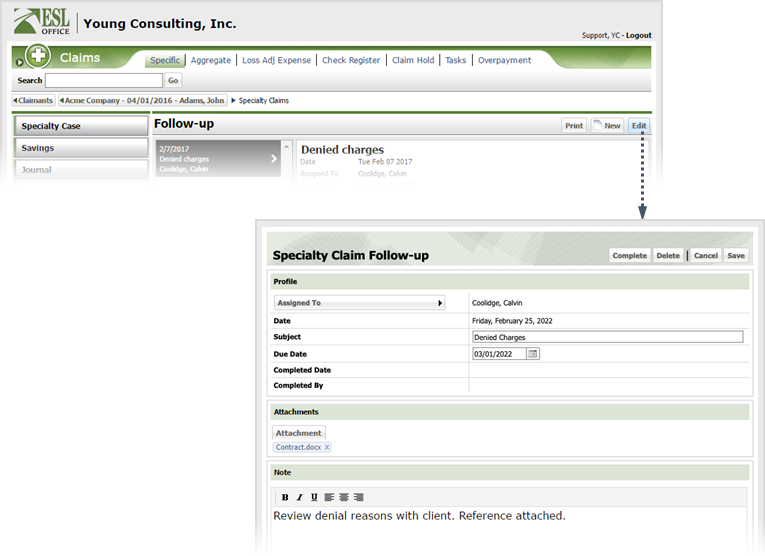
Edit a follow up by selecting from the list of follow ups then clicking Edit to display the Specialty Claim Follow-up window.
16.4
Modify the follow up information as follows
Assigned To
Click the button and search for and select who you want to assign the follow-up to using the Assigned To Search window.
Date
When the follow-up was created. Populated by ESL Office and is the current date.
Subject
Follow-up subject goes here.
Due Date
When the follow-up is due. Enter the date directly in the field in MM/DD/YYYY format or click the calendar icon and set the date using the date picker tool.
Completed Date
When the follow-up was completed. Populated by ESL Office.
Completed By
Who completed the follow-up. Populated by ESL Office and is the logged in user who completed the follow up.
Attachment
If you want to attach a file to the follow-up, click this button and locate the desired file.
Note
Enter any follow-up notes in this text area. use the buttons on the toolbar to set note text type face and alignment.
16.5
Click Save. Click Delete if you want to cancel the follow up and remove it from the claim.