3
Create a Follow Up
3.1
View the desired specialty case details.
3.2
Click the Follow-up category button.

3.3
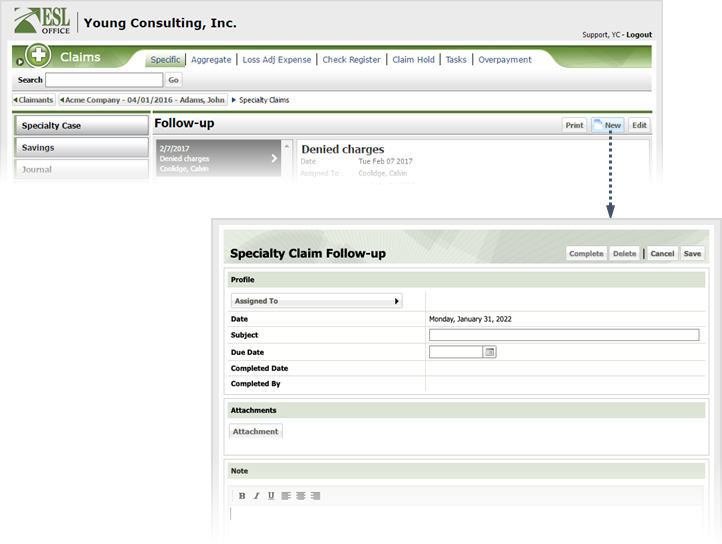
Click New to display the Specialty Claim Follow-up window.
3.4
Specify the follow up information as follows
Assigned To
Click the button to the right of the field and search for and select who you want to assign the follow-up to using the Assigned To Contact Search window. First search and select the desired company, then search and select the desired contact from that company.
Date
When the follow-up was created. Populated by ESL Office and is the current date.
Subject
Follow-up subject goes here.
Due Date
When the follow-up is due. Enter the date directly in the field in MM/DD/YYYY format or click the calendar icon and set the date using the date picker tool.
Completed Date
When the follow-up was completed. Populated by ESL Office.
Completed By
Who completed the follow-up. Populated by ESL Office and is the logged in user who completed the follow up.
Attachment
If you want to attach a file to the follow-up, click this button and locate the desired file.
Note
Enter any follow-up notes in this text area. use the buttons on the toolbar to set note text type face and alignment.
3.5
Click Save.