Request a Check
Search the desired claimants from any specific sub tab (Claimants, Claim Log, Notification Log, or Reserves).
Click the desired claimant from the list.
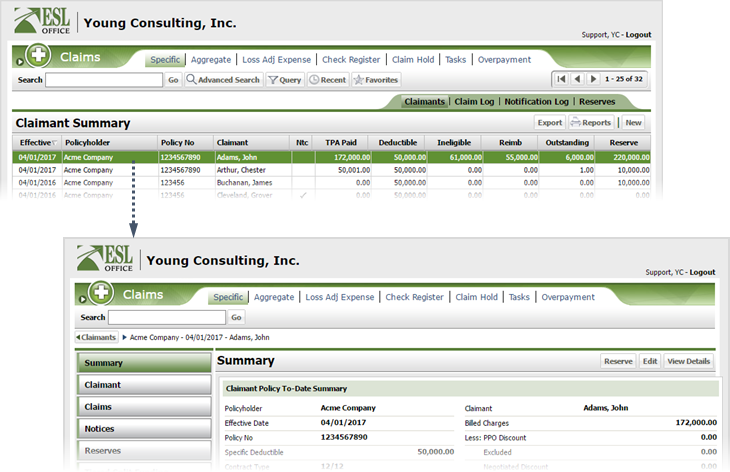
Click the Claims button.
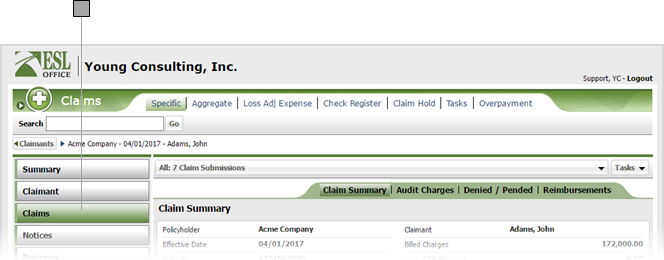
Select the desired submission from the drop-down.
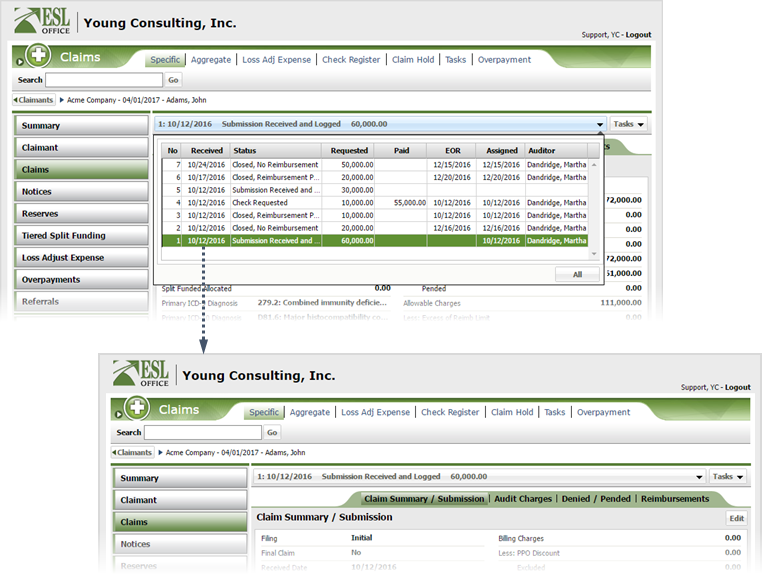
Click Tasks then Reimburse to display the Check Request window.
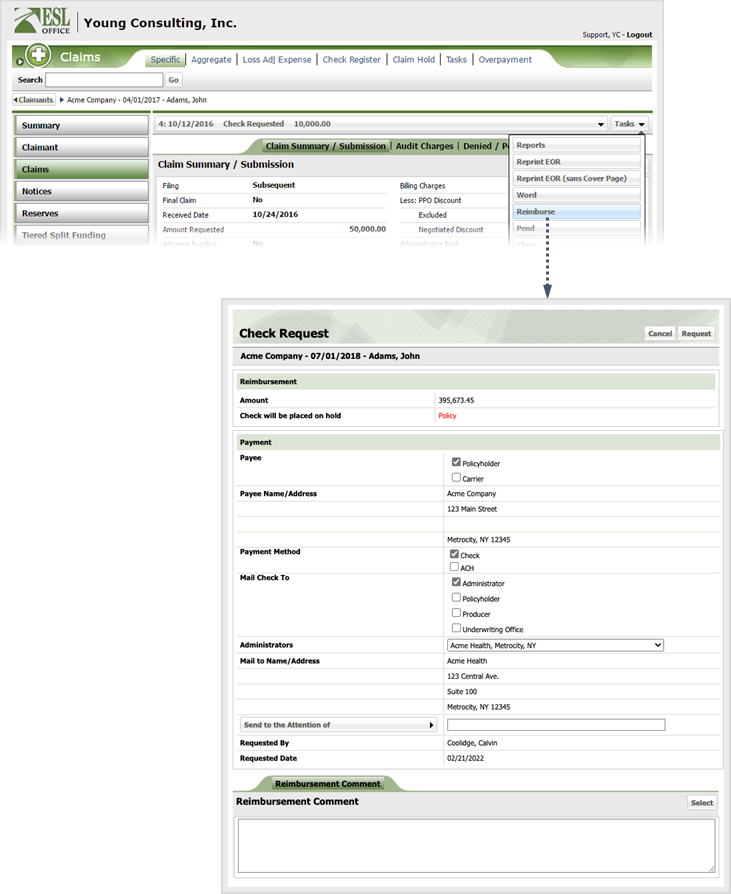
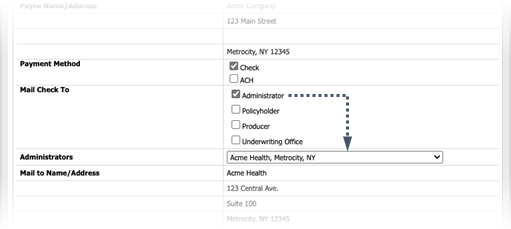
Specify the request information as follows
Check the box corresponding to whom you will be sending the check. If there is more than one option for your selection, a drop-down list appears to let you specify which administrator, policyholder, etc. will receive the check.
Click the button and choose the desired individual from the Attention Of window.
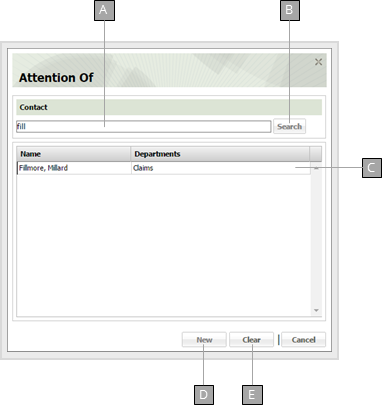
Enter some or all of the contact name you want to search here.
Click to search for names matching your entry.
Search results appear here. Click a contact to select it and close the window.
Click to create a new contact. Not used when searching contacts for check requests.
Clears the Send to the Attention of field and closes the window.
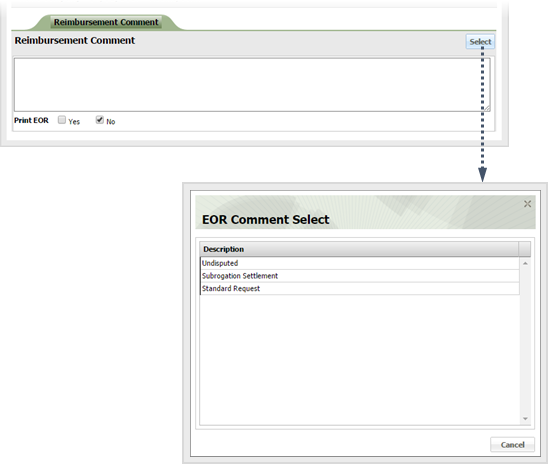
Enter any desired comments in the Reimbursement Comment field. If you want to insert a standard EOR comment, click Select to display the EOR Comment Select window. Click the desired commend to insert it and close the window. Standard EOR comments are defined by your ESL Office administrator.
Click Request.